[22/10/13 : If you’ve come here directly from an external link, you may want to check out the background to the project described in this post before reading on.)
Today’s Graphical User Interfaces are designed to hide all the low-level gubbins that’s going on inside a computer so that you can get on and ‘do stuff’ without having to worry too much about how that stuff is being done. Of course there’s no such thing as a ‘folder’, a ‘file’ or a ‘trashcan’ in the computer’s hardware, but these metaphors that are so commonplace and compelling it’s hard to remember that behind the virtual desktop it’s binary all the way down. And then electrons. And then quantums or something (I’m not sure, I get a bit fuzzy much below Operating System level).
The challenge
The gap between our day-to-day experience of using computers and their underlying reality presents a real challenge when it comes to motivating new Computer Science undergraduates, who have invariably grown up using computers as tools to achieve all kinds of amazing things without having to think too hard about what’s actually going on behind the scenes. To become a virtuoso Computer Scientist, it’s not enough just to learn to throw together applications in whatever the programming language or framework de jour happens to be; you need to understand the instrument from the ground up so that when something breaks, runs slowly or fails to scale, or just feels a bit wrong, you’ve got some hope of making sense of it. The problem is that the gap between the kinds of things that students know computers can do and the outcome of writing their first bit of shell script or assembly language is enormous. So how do you motivate the fact that although the lab PC you’re sitting at is quite capable of playing Grand Theft Auto V, today we’re going to learn to write a for-loop? Yes, we know it’s hard to learn complex stuff. And of course you have to start somewhere. But an appeal to the desire to learn only goes so far, and enthusiasm can quickly fade when you’re constantly confronted with the gulf between your current ability and what you know the machine in front of you is capable of doing in the right hands. You could use high-level toolkits such as Scratch or Alice to do something gratifying with graphics, but though these are great motivational tools at high-school level, they don’t really expose—any may even obscure—the underlying machine’s architecture in the kind of way that’s needed for degree-level study.
Add to this the fact that, unlike their own devices over which they have more-or-less complete control, the PCs we use in teaching labs are shared resources and have to be locked-down to stop users from accidentally messing up the system for the next student, and there’s real potential for an unsatisfying learning experience.
The theory
Enter the Raspberry Pi. It’s small; you can carry it in your pocket. It’s cheap; closer to the price a text-book than a laptop. And for these reasons you don’t expect it to be the most powerful machine around: you’ll forgive its startup interface for appearing to be a bit old -school; you can mess about with its configuration in the knowledge that if you screw things up badly, resetting it to a clean state only takes a few minutes; and, if you drop it in the canal or leave it on the bus, well, it’ll cost not much more than a night out to replace.
Our hypothesis was that the Pi offered an opportunity to bridge this gap: to give students a sense of empowerment by being in charge of their own machine, and a satisfying taste of the basic principles of Operating Systems and Computer Architecture that didn’t rely overly-simplified programming tools. So we bought a whole load of Raspberry Pis, cases, power supplies and SD cards that we could give to the new undergraduates so that they were theirs to keep and use in the labs, and began the process of modifying our physical infrastructure and teaching materials to use these new bits of kit. This is how we did it…
The practice
Cost
Putting this all together cost around £15k, with something in the region of £7k going on the purchase of the Pis themselves (bulk purchase from Farnell’s range of Pi kit was pleasingly painless), around £5k on upgrading the lab’s infrastructure to cope with the additional machines, and the rest on employing vacation students to help out with setup and testing.
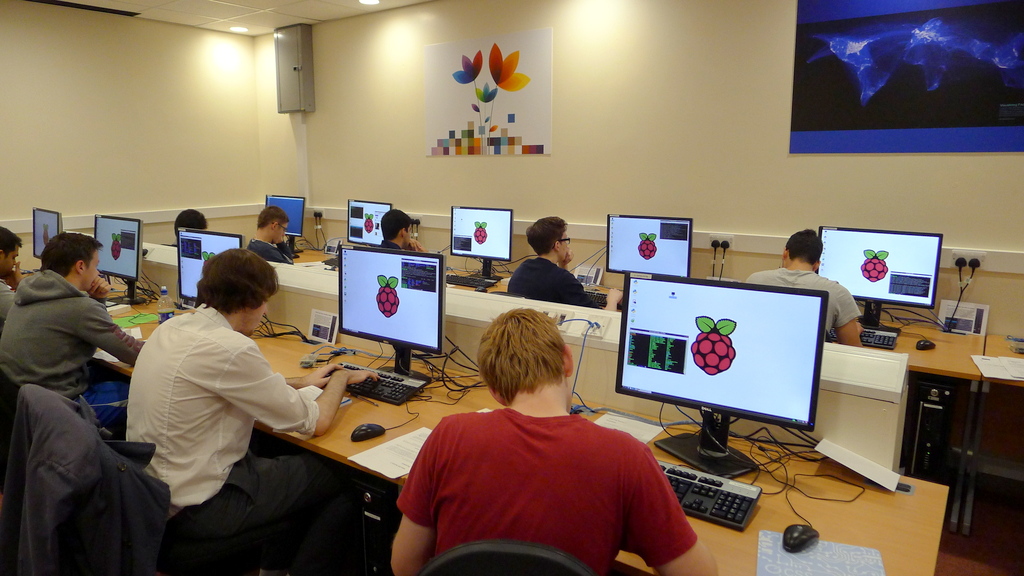
Physical setup in the labs
We set up one of our teaching labs—with around 70 workstations in all—to be able to host Pi-based sessions. Getting 5 Volt supplies to each desk proved to be surprisingly knotty: putting new power sockets on each of the 70 or so desks in the lab wasn’t an option because our existing collection of desktop PCs meant we were already at the maximum power load that building regs would allow, so it would have required a whole new mains supply to be installed to power even the modest extra current needed by Pis. Luckily the Dell monitors already in place had a handy 12 Volt DC outputs designed to drive an optional set of bolt-on speakers, so the addition of a 12V to 5V converter designed for in-car use gave us the micro-usb connector that we needed to power the Pis (with the slight disadvantage that switching the monitor off also kills the power to the Pi).
The networking too was a little fiddly, since the University’s networking team were understandably uneasy about the idea of students being able to plug machines to which they had root access straight into the School’s network. The compromise here was to create a new virtual LAN with a strict-enough firewall in place to stop rogue Pis from doing any damage to other systems, and to register the MAC addresses of each Pi to a particular student so that any problems could be traced back to their originator (this last bit did mean that we had to go through each Pi individually to extract and record its MAC address before the start of term; a slightly tedious manual process made a bit easier by this Python script written by one of our talented vacation students).
The final bit on the practical-front was to come up with a way of physically sharing the keyboard and mouse of the existing desktop machines so that each station didn’t get cluttered with a second keyboard/mouse combo. Using a KVM switch for each desk would have been expensive (and rather less satisfying from a hands-on point of view), and getting students to plug and unplug cables from the desktop machine would have broken the USB sockets pretty quickly (turns out you can get a USB device the wrong way into a USB socket if you push hard enough), so we opted for an extension cable from the monitor’s USB hub (into which the keyboard and mouse where connected) which could then be paired with another extension cable to the desktop machine or plugged directly into the Pi. Using the monitor as a USB hub had the nice side-effect that only a single usb port was used up on the Pi, freeing up the Pi’s second port for removable media if needed. This way, if we did have problems with USB connectors, it would mean replacing a couple of pounds’ worth of cable, rather than messing about fixing a PC or monitor.

Writing the lab exercises
Then came the task of working out what to get the students to actually do with their Pis. We set ourselves two objectives for any exercises we created:
- That after completing the first 4 introductory labs (each two hours long), students should have a good enough understanding of the basics of the Unix command line and whichever graphical environment they’d chosen to be able to start the main lab work associated with other course units, and
- It was primarily motivational stuff, where each exercise achieved something interesting in its own right. Learning about Linux, the Pi and various other tools was a side-effect of achieving that. Ideally we wanted to achieve something ‘practical’ or ‘useful’ in a real-world sense; and failing that it should be something fun.
We also tried our best to adhere to what my colleague Dr John Latham describes as ‘just in time’ explanations; so rather than saying “and here is some magic stuff that we’ll explain another day”, any forward-referencing material should be accompanied by just enough of an explanation for it to make sense in its current context, even if you had to return to a more in-depth explanation later.
Because we only had enough money to kit out one 70-seater lab for Pi-stuff, the complexities of the Welcome Week timetable meant that we had to interleave Pi-based sessions with other introductory material that used the Linux desktop, so we ended up with two sessions focussing on the Raspberry Pi, and two on more general Unix/Linux skills that used our desktop machines. Although this wasn’t originally what we’d intended, it did give the opportunity to reinforce the idea that there really isn’t a huge difference between the diminutive Pi and the more beefy desktop machine.
The lab script we ended up creating is available as a huge PDF, and the LaTeX source is also in github under CC-BY. The tl;dr; version is that labs cover the following things (not necessarily in this order):
- Setting up, logging in
- The command line, and why you should know about it
- Installing stuff on the Pi via the package manager
- The Unix filesystem and file permissions.
- Processes and process ownership.
- Playing retro-adventure games on the Z-machine, and the idea of a virtual machine generally (useful later when students meet Java a little later on)
- Using curl, ssh, scp to move things around from machine to machine
- tar and gzip
- lynx and accessibility of websites for visually impaired people
- Configuring IMAP servers by hand for Mutt and Thunderbird
- Pipes and redirects
- Aliases and simple shell scripts
- All the usual file manipulation commands in Unix (mv, cp, mkdir and the like)
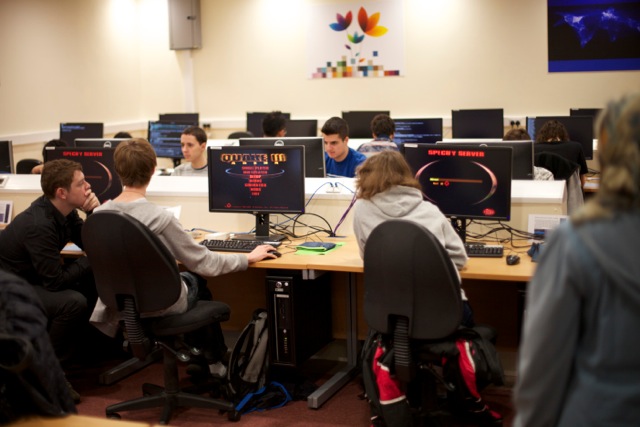
- Installing and playing Quake Arena (for educational purposes, obviously)
- Simple shell scripting, .bash_profile and .Xclients
- Window managers (LXDE, Gnome and Awesome)
- Various Text editors (Nano, gedit, kate)
- Network basics (ifconfig and the like)
- The architecture of X Windows, routing X Windows over a secure connection
- Using a Pi in headless mode as a server via secure shell
- HTTP / HTML, and setting up your own apache server from scratch.
- Vector and raster graphics
- An introduction to the Moodle Virtual Learning Environment
The Results
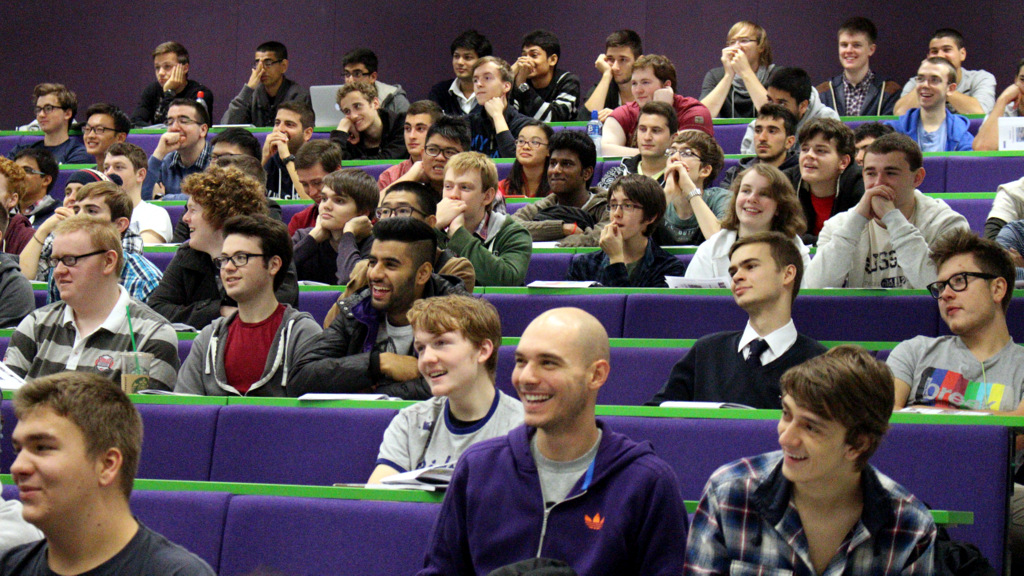
We started the year off in Welcome Week with a short talk from me about why they’re all getting a Raspberry Pi and what we hope they’ll get out of experimenting with them (the same kind of stuff that was in my previous post really, just without the breaking bad references). This seemed to go down pretty well judging by the reactions in the lecture theatre (apart from the one guy on the left at the back who looks deeply unimpressed; tough crowd).
Then the labs started for real. Staffed by Toby, John and Graham, and me, and ably supported by a team of postgraduate demonstrators, we worked through the first four lab sessions each in four groups of around 60 students: that’s 16 labs each of two hours packed into a fortnight. An intense couple of weeks.
Remarkably, pretty much everything worked. The University’s IMAP server collapsed briefly in one of the early labs, one of the 12-to-5 Volt adaptors failed, a couple of USB cables needed a bit of TLC after over-zealous off-by-180-degrees shoving, and a few students forgot the password they’d set on the Pi in the previous session. But on the whole, much to our relief, everything worked smoothly.
There were several impromptu Quake Arena LAN parties (especially nice because students who wouldn’t necessarily have been interacting with one another at this stage in the got together in the real world to shoot one another in the virtual one).
It’s too early to tell what the long-term effects of Pi Man may be, but it definitely got the year off to a really lively start and created a great buzz. In the next post I’ll show the results of a quick survey we’ve just run to get students’ feedback on the experiment, and reflect on which bits worked well, and where there’s room for improvement. But for now I’ll finish by unashamedly cherry-picking some of the more positive comments from the survey that suggest we achieved at least part of what we’d hoped.
“Pi is awesome”
“After bricking my Pi, flashing the SD card using the dd command on my laptop was one of the most unintentionally educational things I’ve done.”
“I think it was very difficult adapting to not using a GUI for the first time really. But it was very interesting and I felt like a computer scientist already”
Credits
Thanks go to Profs. Jim Miles and Carole Goble for the encouragement to do this in the first place. The academic team consisted of me, Toby Howard, Graham Gough and John Latham. The lab setup and infrastructure was managed by Mike Keeley, Tony Curran, Matthew Perry and Steve Rhodes. Financial support for the project was provided by Rosemary Tomkinson and Ian Bradley via the Teaching and Learning Innovation and Dean’s funds. Lab scripts were debugged and improved by Alex Constantin, Ben Mulpeter, Alex Day, Hamza Muhmud and Georgiana Neculae.
175,831 total views, 16 views today
Out of interest, you already have desktops in the lab with molex connectors inside, why did you not use the 5v output from those?
We did think about that, but couldn’t see an easy way of getting 5v outside the case without some unpleasant hackery that might cause warranty issues; and also the machines that are in the lab now are brand new and only arrived a little while before the start of the teaching year, so it would have meant leaving that decision until the last minute. The 12v-to-5v solution is a bit clumsy in some ways, but seems to work fine.
Probably worth mentioning here that the students will deploy their first year assessed team projects for COMP101 on their Raspberry Pi? Show that this is not just a one-off week one gimmick?
I’m writing a follow up post which is a reflection on what worked, what didn’t and what we’re doing next… watch this space.
The Pis are great, I just hope that they will have enough power to run whatever web application that we throw at them later in the year.
Also there could be some room for mischief by spoofing the Pis mac address to impersonate another student, but I’m sure no one would do anything like that.
It’s quite a tricky balance — we want to give people control over the machines so they can learn, but at the same time try to avoid letting things happen that could disrupt the setup for other people. The school network will only allow the Pis to work on a particular VLAN, and that’s fairly heavily firewalled/monitored. Also, the MAC addresses of each Pi are registered to a particular student, so if something bad does happen we think we can get to the problem pretty quickly. So yes in principle you could spoof the IP address, but I think it would get clobbered pretty quickly.
But, it’s all a bit of an experiment still!